HAPPY THANKSGIVING ERRBODY!!
In between mouthfuls of turkey and stuffing, I'm sure you have been wondering how molds are made. I know, I also have molds on the brain. Which is why I'm going to give you a small glimpse into this very exciting technique. So get ready to learn!
These are the basic tools that I use to create a mold. I use a silicon rubber that is flexible like play-doh and green like slime. The mold frame is sized to accommodate my piece with extra space all
around, and I also use a separating cream that works really well to
minimize the cutting I have to do.
This is the test subject, a ring that I carved in wax and cast into sterling silver.
This is one-half of the mold. I cut slices of the silicon rubber, and pack it into the frame. I also use brass locks, which ensure that both sides of the mold fit together perfectly once they're cut apart.
This is the vulcanizer. It uses heat and pressure to harden and solidify the silicon rubber. It takes about 15 minutes per layer.. In this case, there are three layers of silicon rubber so this mold took 45 minutes to vulcanize.
Once it's done vulcanizing, I use my fingers and a sharp scalpel to cut the mold open. This mold is certainly not winning any beauty pageants, but it gets the job done.
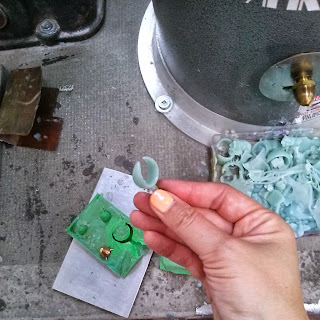
This is the wax injector, which sits prettily next to the vulcanizer. It uses the pressure from an accompanying air compressor to shoot hot wax into the mold. Every mold is different, and it takes a bit of experimenting to figure out the correct pressure and angles to get good wax pieces.
And voila, here is a successful wax piece. It should be an exact replica of the original master model. Now I am ready for hours and hours of wax-pulling and casting fun! After the turkey of course. And the stuffing, and the potatoes, and the squash...
Gobble gobble y'all!


No comments:
Post a Comment